This Domain Name Is Up for Sale
Contact Us

Guide To Create Unpredictable Strong Passwords For Online Accounts And Services

Creating a password doesn't ensure that your email accounts are more secure.Simple passwords can be easily predicted and hacked by just few attempts.A password is the only way to log in into your online accounts and make them more secure.You think that without entering the password no one can log in to your accounts no matter whether it is a google account,microsoft account,yahoo account or a facebook account.But what will you do if your password is vulnerable and can be easily predicted by anyone that is close to you.In that case you might not know that these people might be accessing your accounts without your concern.

use strong passwords that are unpredictable

So in this post I will tell you some facts about creating strong passwords for all your online accounts like google,facebook,itunes,yahoo and facebook.Creating an unpredictable strong password will ensure stronger security to your email accounts.

Guide To Create Unpredictable Strong Passwords For Online Accounts And Services

1.Avoid Personal Info : Always avoid personal information to be used as a password.Your personal info can be your birth date,your mobile phone number,driving license number,your spouse name,her birthday etc.This information can be easily predicted by anyone close to you.So never use personal information in passwords.

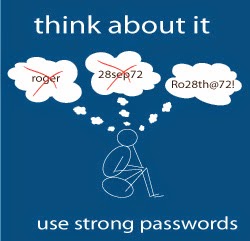
2.Use Words Which You Never Heard : Most people choose words that they use often.For example a person having an interest in sports will choose a password like 'barcelona','realmadrid' etc.So anyone who knows about his favorite sports can easily predict this simple password in just few attempts.So to create a strong password use topics that you are not familiar with,for e.g 'wu-ji-bi-fan'.This is a chinese proverb and is a strong password due to special symbols in it.So nobody can predict it.To find these kind of words search on google like 'proverbs in chinese or japanese' and choose some tough words from it.

3.Use Of Special Characters : To create strong passwords use of special symbols is must.Without these special symbols and characters your password is just a normal one.You can use any special symbol visible on your computer's keyboard.Avoid @,The dot(.),underscore( _ ) because these are used the most.Try using *$!%^.

4.The Uppercase Letter Phenomena : Using an uppercase letter in your password string will make it highly secure.Because suppose if somebody gets your password and it enters your password then he/she will always get a password error because he/she will never know which letter of the password is uppercase.So make some letters in your password uppercase at alternate positions like A....b..B..M.kK.

5.The Password Length : Your password should have a good length more than 20 characters including a combination of letters,symbols and numbers.Short passwords are always vulnerable no matter how strong they are.The longer the passwords the more secure they are.A 20+ characters password is almost unpredictable if it has been chosen wisely.

6.Don't Forget Numbers : How can you forget numbers ranging from 0-9.These numbers have equal importance to special characters.Their combination is more strong than using simple words.You can use any number ranging from 0-9 to create a strong password.

7.Check Password Strength : While creating an account on google and microsoft you can check the strength of your password by just looking at the password strength meter.The more green the password strength meter the more stronger is your password.

Example of a strong password : Honda.Cbr15x^&.Ghost2Racer$.%%

What's The Use Of Creating A Strong Password If You Can't Remember It

Yes there is no use of creating strong passwords if you can't recall them when you want to login into your online accounts.To avoid this problem write these passwords on a piece of paper and try to memorize them daily for 2 to 3 days.Within no time you will be able to remember these long and strong passwords without having to write them again on paper.The more you use them the more you remember them.You can take a test of yourself every week to ensure that you still remember each and every strong password associated with your google,yahoo,itunes,microsoft or facebook account.

What If You Still Feel That Strong Passwords Are Not Enough

If you think that these strong passwords are not enough to secure your online accounts then you are not wrong.If you want a 2-layer security on your google,microsoft accounts then you can enable 2-factor authentication on these accounts.


You can check the following 2-step verification articles.

1.Enable 2-step verification on Google accounts.
2.Enable 2-step verification on Microsoft accounts.
3.Enable 2-step verification on Facebook account.

Use CF Auto-Root To Root Samsung Galaxy Note 8.0 WiFi N5110 On Android 4.1.2 Jellybean OS

Use CF Auto-Root To Root Samsung Galaxy Note 8.0 WiFi N5110 On Android 4.1.2 Jellybean OS Samsung Galaxy Note 8.0 N5110 is the WiFi only version of the galaxy note 8.0.Good news for its advance users as the galaxy note 8.0 N5110 can now be rooted with CF Auto-Root tool.Rooting your galaxy note 8.0 would be beneficial if you want to install android apps that require root access.Unfortunately these apps won't run on an un-rooted galaxy note 8.0 due to missing root access.

galaxy note 8.0

Also if you root your note 8.0 then you can install custom android roms on it.In this tutorial we will be rooting your galaxy note 8.0 N5110 by using CF Auto-Root tool and Odin for windows.

Important Instructions


  • This tutorial is meant to be applied only on samsung galaxy note 8.0 N5110 running on android 4.1.2.Do not apply this tutorial on other tablets.
  • Remove Samsung KIES from your pc before rooting because it may give you rooting errors like heimdall error.If you don't want to remove it then stop "Kies.exe" and "KiesTrayAgent.exe" from processes in windows task manager.
  • Install Samsung USB drivers for mobile phones.
  • Enable USB debugging in developer options menu.Goto 'Settings>About Device>Tap on Build Version 7 times' to unlock developer options.Now enable USB debugging.
  • Make sure your galaxy note 8.0 N5110 has enough battery to survive.
  • Backup all important data stored on your tablet otherwise you will lose it.
Files Required

Root Samsung Galaxy Note 8.0 WiFi N5110 On Android 4.1.2 Jellybean OS With CF Auto-Root

  • Download and extract the CF Auto-Root package and Odin v3.07 to separate folders.
  • Turn off your galaxy note 8.0 and reboot it into download mode by pressing home,power and volume down buttons at the same time.
  • When you see warning message,press volume up button to continue entering the download mode.
  • Now launch odin.exe and connect your tablet to pc via usb cable.
  • Let odin recognizes your tablet.When it is recognized you will see a message  "Added!!" and the field under <ID:COM> section will turn blue.This means that tablet is ready for rooting.
  • Make sure that "Re-Partition" option is unchecked and do not change other settings.
  • Put a check mark on "PDA" and click PDA and browse for the CF Auto-Root package file named as 'CF-Auto-Root-konawifi-konawifixx-gtn5110.tar.md5'.Load this file in PDA.
  • Click Start button to initiate the rooting process.
  • It will take few seconds and on completion odin will return a message 'PASS'.Your tablet will reboot automatically.Now you can disconnect it from pc.
  • You will see a new app in apps named as SuperSU which confirms that you have successfully rooted your galaxy note 8.0 WiFi N5110.
  • Now you can install android apps that require root access.
Troubleshooting

  • If odin gets stuck then disconnect the tablet and force reboot it then again repeat the rooting process.
  • If after rooting your galaxy note 8.0 freezes then factory reset it in android recovery mode.Enter recovery mode by pressing home,power and volume up buttons at the same time.But make sure that tablet is turned off before entering recovery mode.
  • Now goto google play store and install ROM Manager to flash TWRP/CWM recovery.This is a necessary step,don't skip it.
Now you have successfully rooted your galaxy note 8.0 wifi N5110 on android 4.1.2 jellybean.

Awesome Trick To Play/Watch Facebook Videos On Android Phones And Tablets

This tutorial will teach you to play/watch facebook videos on android phones and tablets.To play facebook videos on your android phone or tablets you need the flash player plugin for android.Facebook videos can't be played in the official facebook app and when you try to play a video by clicking it then it will take you to either youtube app or try to open that link in an android browser.If the video belongs to youtube then clicking the link in facebook app will automatically launch the youtube app on your android phone.

Many people ask me that how to play facebook videos on their android tablets,because most times they see a blue lego box in place of facebook video player.We can play facebook videos on our android phones and tablets exactly the same way as we watch them on our desktop computers.So in this post I am going to tell you the working solution for this problem.Firstly I will tell you the solution for this problem and later I will explain the concept behind the trick.

Files You Need

  • Mozilla Firefox for android.Download
  • Adobe flash player 11 apk for android 4.1 jellybean.Download.
  • Adobe flash player 11 apk for android 4.0 ics.Get it here.
  • Adobe flash player 11 apk for android 2.3 gingerbread.Download.
Note : Download the adobe flash player apk according to the android version of your phone.For example if your phone is running android 4.1 jellybean then download flash player apk for jellybean.No need to download all files.

Trick To Play/Watch Facebook Videos On Android Phones And Tablets

Trick 1 : By Using Mozilla Firefox For Android

Before following the below mentioned steps do one thing that login into your facebook account from a computer and put a youtube video link on your timeline and do not remove the preview.You will play this video in your android tablet on facebook,you can play any video but I want to show you the proof that's why I am asking to put a video to your timeline.It will look like as follows.


  • Download and install firefox for android from the link given above.
  • Download and install the respective flash player apk for your phone.
  • Make sure that you have enabled the data connection on your phone.
  • Now open firefox and goto "facebook.com" by simply putting the address in the address bar.
  • Wait for few seconds till the page loads to facebook homepage.
  • Now click the menu button of your phone and select "More>Request desktop site".Put a check mark on it.The page will auto reload,do not stop it.
  • After few seconds you will see the desktop version of facebook on your android tablet.
  • Now login to your account from your android tablet.Just click on the video you recently posted on your timeline.
  • You will see that the video will play on facebook itself and won't take you to third party websites for watching.You can see the proof below the same video is playing on my android phone in mozilla firefox.


Trick 2 : For Any Other Android Browser

  • For other browsers you can load facebook in desktop mode by entering this address "http://www.facebook.com/?m2w" in the browser's address bar.
  • ?m2w after "http://www.facebook.com/" will tell the browser to load facebook in desktop mode on your android tablet.
  • Now login in to your account and repeat the steps in Trick 1.
  • But this trick is not as useful as Trick 1 because most android browsers doesn't support the flash plugin fully as compared to mozilla firefox.
  • So to play facebook videos on android phones and tablets,you should use firefox browser,because it will work without any problem and I have shown you the proof of facebook videos playing on android devices.
How This Trick Works

This trick works on a simple principle that "make facebook think that you are accessing it from a computer and not an android device".But actually we are accessing it from android,which it doesn't know and loads the desktop version on our tablets and phones.For this trick we used "Request desktop site" option of firefox browser and for other browsers put a "?m2w" string after facebook address.So facebook thinks that we are accessing it from a computer that's why we are able to play/watch videos on facebook.

Share this wonderful article if you like it.

Run Android Apps On Windows And Mac OS X Without Bluestacks App Player

Are you an android apps fan then you are sure downloading tons of them. Most of the android apps are useful tools that simplify our works and others falls in entertainment category like some android games. If you are bored of running android apps on your phone and want to run them on your windows pc or mac os x then I will teach you how to do that.

For this simple trick we won't be using bluestacks app player and windows android because they require higher graphics requirement and if your pc doesn't fulfill this requirement then both of these tools won't work.Higher graphics require OpenGL version greater than 2.1.So if your computer's graphics chip is outdated I mean not supporting OpenGL 3.0 then you can't run bluestacks app player and windows android on your pc.

On a low end pc you can't run bluestacks app player due to outdated OpenGL version and low graphics performance,so you can't even run android apps that doesn't require any GPU.But with the trick that I am going to tell you here you can run most android apps that doesn't require higher GPU performance as that on a real android device.

Run Android Apps On Windows And Mac OS X Without Using Bluestacks App Player

Create An Android Virtual Device


  • First of all download the android sdk or eclipse adt bundle for windows and mac os x.But I would highly recommend to download the adt bundle because it contains the android jellybean emulator,android sdk and eclipse visual sdk.
  • You can download the adt bundle for your windows and mac os x here.For mac os x when you goto to this link just scroll down a little and click "Download For Other Platforms" and select Mac OS X 64-bit.
  • Extract this adt bundle and save it somewhere on hard disk.In this folder you will find two sub-folders "eclipse","SDK" and file "SDK Manager".
  • Click this "SDK Manager".Now from "Tools" select "Manage AVDs".Click "New" on the right side.
  • A new container window will open to create a new android virtual device.Enter the name of virtual device.Enter name as 'mydevice'
  • In 'Device' option select 3.7" WVGA (480x800: hdpi).In 'Target' select "Android 4.2 - API Level 17".
  • Put a check mark in both check boxes.
  • Keep internal storage to 100 and SD Card also 100 MiB.
  • If your pc is using pci graphics cards like AMD Radeon or NVIDIA GPU then check "Use Host GPU".
  • Click OK to create your AVD.
  • Now select 'mydevice' and click 'Start' on the right side.
Download And Install Your Favourite Apps

  • Now after clicking 'Start' your android emulator will run.It will take time to start.
  • When it finishes starting you will see android 4.2 jellybean home screen.
  • Make sure your computer is connected to internet.
  • On the top of the home screen you will see google search bar.Just click on it with computer mouse.
  • Just search your favorite android apps in this google search.For example you can search 'call recorder apk' or 'google maps apk'.Make sure to put the word apk after the app you are searching.
  • You can download these apps from many third party websites.So download the apk file from this android emulator.
  • After downloading slide the notification bar down and click on the downloaded apk file.It will ask you to install the app.Just do it.

  • It will take few seconds to install.Click open when install is finished.
  • Now run your favorite apps on mac os x or windows.
 

Now you can easily install android apps on windows pc or mac os x. But note apps requiring gpu performance will not run until your computer's graphics chip support OpenGL above 2.1.So if you want to play android games on your pc then your computer should have a 2.5 GHz CPU,4 GB RAM and a GPU like AMD Radeon or NVIDIA GeForce.

Share this article if you like it.

How To Delete Picasa Albums From Android Gallery

Picasa is a web image organizer and editor owned by Google.Picasa is available for desktop pc's also and you can use it on the web also.Picasa is a Google account service that is associated with your Google account.Any photos that you store in your Google account will automatically move to picasa.In this post i will let you know that how to remove or delete picasa albums from android gallery.

google picasa-logo

Picasa albums will become visible in your android gallery if you have synced the picasa web albums associated with your Google account on your android phone.After syncing these albums they will be visible in your android phone's gallery.Initially these albums are stored as network files but they reside in phone's storage after they are downloaded completely and they may decrease internal phone storage if the images are too many.

So if you don't want them to see in your android gallery then you can remove them very easily.

Delete Picasa Albums From Android Gallery

  • Go to Application settings in android and click "Manage applications".
  • Click the All tab which will show you all the apps stored on your phone and sd card.
  • From this list choose "Gallery" and then click "clear data".
  • After clearing the data the picasa albums will be deleted immediately.
  • Now if you are using android 2.3 gingerbread then disable "Auto Sync" in accounts and sync settings.
  • For android jellybean you can manually disable picasa sync in accounts and sync options.
You have successfully seleted the picasa web albums from android gallery.

Samsung Galaxy Tab 2 7.0 Vs Galaxy Tab 3 7.0 Full Review

Samsung Galaxy Tab 2 7.0 Vs Galaxy Tab 3 7.0 Full Review Samsung Galaxy tab 2 7.0 was launched in February 2012 and since then this android tablet has got good market response.The galaxy tab 2 is currently available in two models P3100 and P3110.The P3100 version has voice calling facility which means that you can make voice calls over cellular network while in P3110 there is no such facility and its the wifi only version.The hardware and software specifications of both these android tablets are same.

galaxy tab 2

There is a huge price difference between these two android tablets.You can buy a budget android phone with this price difference sum.So in this post I will tell whether to buy this android tablet or not,also we will compare this android tablet with the upcoming galaxy tab 3 7.0 P3200 and P3210 versions.After reading this review and comparison you will be able to decide which tablet to go for.

We will review the galaxy tab 2 in following domains including the cpu,gpu,ram,storage and screen.

Samsung Galaxy tab 2 Full Review

1.CPU : The galaxy tab 2 GT-P3100 and GT-P3110 have a 1 GHz dual core cortex A9 processor which is double in cpu speed and performance than any single core cpu android smartphone.A dual core cpu is best at handling heavy android games because 2 cpu cores can do the work much faster and efficiently.This android tablet doesn't lag during gameplay.

2.RAM : The galaxy tab 2 has 1 GB of RAM,out of which 750 MB is user available and rest is system reserved.750 MB of RAM is enough to run almost any android app or heavy android games.You will never fall short of RAM on this tablet.

3.GPU : The graphics of galaxy tab 2 is powered by PowerVRSGX540 GPU which is an adavnced GPU much better than adreno 200 (found in low end android phones).The PowerVRSGX540 GPU is good at 3D rendering on android,and it can handle HD videos also.So in this price range this GPU is more than enough for any serious android gamer because it has the tendency to run almost any android game.

4.Storage : It has inbuilt storage of 8GB or 16 GB.Both versions are available in 8 GB or 16 GB variants.If you have the 16 GB version then 11.5 GB is user available.So storage is big enough on this android tablet and is expandable upto 32 GB through a micro sd card.

5.OS : The galaxy tab 2 runs on android 4.1.2 jellybean.You won't get features like multiwindow but still the android jellybean looks good and runs very smooth on this tablet.The android 4.2.2 update for galaxy tab 2 will come soon.

6.Screen And Camera : This android tablet features a 7 inch PLS LCD capacitive touchscreen with a resolution of 1024x600 pixels and pixel density of 170 ppi.We can play HD videos on this tablet.But the galaxy tab 2 doesn't play most mp4 movies,so for this use MX player app.The screen isfairly vibrant and you won't see pixels unless you bring your eyes very close to the screen.But with 16 M colors display the screen looks good and capacitive touch is very responsive.

The galaxy tab 2 has 2 cameras.Primary camera is 3.15 MP without LED flash and record HD videos at 720p HD while the secondary camera is VGA.

Galaxy tab 2 Vs Galaxy tab 3 7.0

Galaxy tab 3 7.0 is recently launched in two variants P3200 and P3210.The P3200 model is the 3G and cellular version while the P3110 is the wifi only version.The features of galaxy tab 3 are similar to galaxy tab 2 but few of them are not officially confirmed.Lets check some of it main specifications.

1.CPU : The galaxy tab 3 features a 1.2 GHz dual core processor which is better than its predecessor galaxy tab 2.It is slightly faster in cpu speed.

2.RAM : The galaxy tab 3 also has 1 GB of RAM.So there is not much difference between the two competitors.

3.GPU : The GPU of galaxy tab 3 P3200 and P3210 is not yet officially confirmed.Some sources say that is has a Vivante GC1000 Core GPU which will provide double the performance than galaxy tab 2.Some sources say that it has MALI 400 MP3 GPU but it may not be true because its specifications at GSMArena doesn't show any GPU information.So to get the correct information you should wait till its release.A benchmark release of this tablet will clear all doubts about the GPU.

4.Camera : It has a 3.15 MP primary camera and 1.3 MP secondary without any LED flash.But GSMArena says it has LED flash but we didn't find any LED flash in the pictures provided by GSMArena.

5.Screen : The screen is just normal tft with 16 M colors,1024x600 pixels resolution and 170 ppi pixel density with no PLS LCD technology as in galaxy tab 2.So we can't say whether its screen is as bright as galaxy tab 2.

Verdict

If you are looking for a branded budget android tablet then the galaxy tab 2 is the best choice right now.Also don't buy the 3G version of this tablet if you are just buying it for gaming because the P3110 wifi version has same specification except the voice call facility and 3G.For the 3G version of this tablet you need to pay around $104 more however both versions of galaxy tab 2 has same hardware and software specifications.So make your decision wisely.

If you want to wait for the release of galaxy tab 3 then this is also a good choice for you because on its release you will know everything about it.The galaxy tab 3 would be better option if it will have a Vivante GC1000 Core GPU or MALI 400 MP3 GPU,a brighter screen display and a camera with LED flash.The price of galaxy tab 3 is not yet officially confirmed,so if you want to make the best choice between these android tablets then you should wait for some time.

6 Tips To Secure Data On Cloud Storage

6 Tips To Secure Data On Cloud Storage Cloud Storage is getting popular day by day in this digital world.Storing your important data on cloud is a promise to yourself that it is safe from hostiles and malware attacks.Cloud storage servers are better at defending themselves against hackers,phishing and malware attacks than your standalone computer.

cloud storage

The reason behind cloud storage popularity lies in security,global availability,large storage and integrity.Cloud storage is more secure to store your data but it is not as safe to store confidential,top secret or sensitive data as it may leak out,no matter how tight is the security.So you should be aware of what type of data you are storing on cloud.

  • Security : Cloud storage servers are more reliable and secure than our home based personal computers.They fight with more viruses and malwares than our personal computers,and they are very well at defending their storage against such attacks.
  • Global Availability : You can access the data stored on cloud globally that you can't do with your pc without syncing it with other devices like your own smartphone.But cloud server runs all the time so you can access your data anywhere and anytime and in any country.
  • Data Integrity : The cloud storage ensures data integrity which means that it doesn't allow external changes to your personal data stored on the cloud.
  • Large Storage : Today most cloud storage providers provide us a large storage space upto 15 GB.Consider google drive which is providing the same.This much of storage is enough to store your personal data.
Some popular cloud storage providers are google drive,dropbox,box,microsoft skydrive and apple's icloud.

6 Tips To Secure Your Data On Cloud Storage 

1.Choose Your Passwords Wisely : Don't choose passwords that can be easily guessed by your enemies.Choose a very strong password that is almost un-hackable.A strong password leads to tight security on cloud.Never reuse your old passwords.

2.Use 2-Factor Authentication : Almost every cloud storage vendor is providing 2-factor authentication or 2-step verification.You should enable this security feature on your cloud server's account.You can check tutorial for enabling 2-factor authentication on google drive account here and microsoft skydrive account here.

3.Encrypt You Data : Before storing your personal data to cloud you should encrypt it.Data encryption will lead to stronger security as the encrypted data can't be read without decryption.There are many software available to encrypt any kind of digital data.These software encrypt the digital data into binary coded files which are of no use to others who can't decrypt it.But make sure you can decrypt it later.

4.Create Password Protected Zip Files : After encrypting the data you can make a password protected zip file for different encrypted files.Also you can split a single file into multiple zip files and store the different parts on different cloud servers.Fo example if you have file of around 500 MB then you can create multiple password protected zips of this file and store on different cloud servers.If you do this then nobody can hack your personal data because they never know where you stored other zips.However if they manage to get few zips of the same file then they will not be able to extract it due to missing parts.

5.Timely Backup Data From Cloud : Natural calamities,massive server crash always be a problem to the human made cloud storage servers and interfere in their operation that may result in loss of data,but it may hardly happen because your data is stored in multiple copies to avoid data loss.But it is also a good decision to backup data from cloud from time to time.

6.What Type Of Data To Store On Cloud : You should decide what type of data should be stored on cloud storage.Data that is not of use to others should be stored and the data that contains your personal information,passwords or anything sensitive or top secret data should be avoided at any cost.Also do not share your personal data with anyone on cloud and do not create links to your personal folders.Change the visibility of your data to yourself only.

These were the six tips to secure your personal data on cloud.Hope you liked them.If you liked the article then take 2 minutes to share it.

How To Enable USB Mass Storage Mode On Samsung Galaxy S4

How To Enable USB Mass Storage Mode On Samsung Galaxy S4 USB mass storage enables us to quickly move data between our android phone and desktop or laptop computers.USB mass storage option is missing in all Samsung android smartphones running android 4.0 ICS or later.In these smartphones we have only one option and that is MTP.MTP stands for Media Transfer Protocol and works similarly like USB mass storage but it can't compete with it because the data migration speed is very slow.The best alternative is to use a high speed usb card reader to quickly move data between your galaxy S4 and computers.

galaxy s4 mass storage mode

There is a problem with MTP mode that we can't see image thumbnails as they are treated as protected DRM content and data moving speed is very slow and it can take much time if you have large files.But there is an other trick by which you can enable USB mass storage mode on Samsung galaxy S4 by using an app called SG USB Mass Storage Enabler.This app is specially designed for Samsung galaxy series to enable their mass storage mode.

This app works on galaxy S4 GT-I9500,GT-I9505,AT&T SGH-I337,Verizon galaxy S4 I545(not tested yet) or any other version of rooted galaxy S4 that support this app.But for this app to work on your phone,it has to be rooted first.So first root your galaxy S4.I have a rooting tutorial for Verizon galaxy S4 but I can't say whether this app work on galaxy S4 I545.You can check the tutorial here.So after rooting the phone you can go on installing this app from google play store.

Enable USB Mass Storage On Samsung Galaxy S4


  • After your phone is rooted goto google play store and download SG USB Mass Storage Enabler app.You can download it from this link
  • Install this application and connect your phone to pc via usb cable.
  • Now launch the mass storage enabler app.
  • When you launch this app you will see a button "Mass Storage Mode".


SG mass storage enabler for galaxy s4

  • Click this button to enable mass storage mode on your galaxy S4.
  • If the app prompts for root access then allow it to grab root access.
  • Now you have successfully enabled mass storage mode on galaxy S4.
Important Guidelines


  • To enable the mass storage mode on galaxy S4 you need to root your phone.If you are a beginner then do not root your device as it may damage your phone.
  • This tutorial is for advanced users only which have already rooted their galaxy S4 smartphones.
  • If you don't want to root your phone then you can use a high speed usb card reader to use as an alternative to usb mass storage mode.
  • This app will not work with the internal storage of the phone due to hardware and software limitations.
Benefits Of Mass Storage Mode On Galaxy S4

  • Allows us to move data quickly between the phone and computer.
  • The data transfer speed is higher in mass storage mode than in MTP mode.
  • The mass storage mode doesn't have DRM content limitations.
  • If your phone is already rooted then this trick is for you.
Now you have successfully enabled the USB mass storage on your Samsung Galaxy S4 android smartphone.

How To Update Samsung Galaxy S Advance I9070 To Official Android 4.1.2 Jellybean XXLPZ OS

How To Update Samsung Galaxy S Advance I9070 To Official Android 4.1.2 Jellybean XXLPZ OS Samsung has recently launched the android 4.1.2 jellybean XXLPZ update for the galaxy s advance I9070.The galaxy s advance can be upgraded via OTA by using Samsung KIES.The new update came to fix out some bugs that were present in the previous version of jellybean running on galaxy s advance.These bugs were annoying the users of the galaxy s advance android smartphone but with this XXLPZ android 4.1.2 jellybean update these bugs are fixed for sure.


Some of these bugs included the retarded performance on this android phone that is the galaxy s advance is running very slow as compared to the android 2.3 gingerbread.However I have published an article to downgrade galaxy s advance to android 2.3 gingerbread due to this slow performance,you can check it hereThis slow performance is the bug which is experienced by almost every galaxy s advance user.The other bug was that when we record a video on galaxy s advance,sometimes the phone gets stuck and needs to be restarted and lastly the camera zoom in galaxy s advance is not working.The previous android 4.1.2 jellybean update for this android smartphone was not the stable one,and hence Samsung came with  a stable update this time named as XXLPZ.

So you can use Samsung KIES to update your galaxy S advance I9070 to latest android jellybean 4.1.2 XXLPZ OS.However if you haven’t received the OTA update in your country then you can manually update your phone which I am going to explain here.To manually update the galaxy s advance I9070 to latest android OS you must read the guidelines below carefully.

Important Guidelines

  • The tutorial is meant to be applied on galaxy s advance I9070 only and can’t be used on other models of it.
  • This is only a minor update for bug fixes.So don't expect any UI enhancements or upgraded features.
  • By using the manual update tutorial you are taking the damage liabilities that if the phone gets bricked you can’t blame us.But if you follow the steps carefully it would hardly happen.
  • Backup entire data stored on the phone’s USB storage.Backup android apps apk,contacts,sms messages and any important data.
  • You can use androzip or android assistant to backup android apps and SmsBackupAndRestore to backup sms messages.You can see tutorial to backup android apps here. 
  • Enable USB debugging by going to "Settings> Applications> Development> USB debugging".
  • This tutorial can be applied on both rooted and non rooted versions of galaxy s advance.
  • If your device is rooted then after updating to android 4.1.2 jellybean firmware the root access will be lost and your phone will become unrooted.
  • This procedure won’t void the warranty of your phone.
  • The phone’s battery should be fully charged or upto 80% level to avoid power failure issues.
Downloads
  • Galaxy S Advance USB Drivers Download
  • ODIN for windows.Get it here.
  • Android 4.1.2 Jellybean XXPLZ ROM.Download
Manually  Update Samsung Galaxy S Advance I9070 To Official Android 4.1.2 Jellybean XXLPZ OS


  • Download and install Samsung USB drivers for mobile phones.These drivers are very essential for communication between ODIN and your galaxy s advance.
  • Download odin from the above link and extract the files to a folder,also download the android 4.1.2 jellybean XXLPZ rom and extract it to other folder.
  • Now turn off your phone and remove the battery for few seconds,then put it back and reboot it into download mode.
  • To reboot into download mode press the volume down button,home button and the power button all at the same time for few seconds.
  • Do not release the button until your phone vibrates and you see a warning screen.On warning screen press volume up button to continue to go into download mode.


  • Now launch odin.exe on your computer and connect your phone via USB daat cable.
  • Let odin to recognize your phone.When your phone is recognized then the "ID:COM" section in odin will turn blue and you will see a message "<ID:0/016> Added!!".


  • This means that everything is okay and your galaxy s advance is ready to be flashed with the latest jellybean rom.
  • In odin under "Option" menu make sure that "Auto Reboot" and "F. Reset Time" are checked and the "Re-Partition" option is unchecked.Do not check any other option.
  • Now check the PDA and click the "PDA" button and pick the jellybean firmware file which you have downloaded.It has an extension of ".tar.md5".Load this file in PDA.
  • Now click Start to launch the flashing process.It will take few minutes to update your galaxy s advance.
  • After successful update the phone will reboot automatically with latest android 4.1.2 jellybean OS.
Odin Troubleshooting


  • If odin gets stuck in the middle then disconnect your phone and close odin.
  • End the odin process in the windows task manager and relaunch it.
  • Remove your phone's battery,then put it back and reboot it into download mode and repeat the manual update procedure.
  • If odin gives you error like "parameter is incorrect" then double check the file loaded in PDA and also check USB drivers are upto date.
Problems After Updating Galaxy S Advance To Android 4.1.2 Jellybean XXLPZ
If after updating the phone you are getting some problems in galaxy s advance like lags,continues boot loop or the phone hangs or halts the try the following steps.

  • Make sure to remove sd card before doing this as this can accidently wipe data from the sd card.
  • Turn off the phone and reboot into recovery mode by pressing the home,volume up and power buttons at the same time.
  • Do not release the buttons unless you see android system recovery.
  • Now move down by pressing volume down key and select "wipe data/factory reset".Press the home button to select this option.Your device will be factory reset.
  • Now go back and select "wipe cache partition".
  • Now again go back and select "reboot system now".
  • You are done.
Now you have successfully updated the Samsung galaxy s advance I9070 to official android 4.1.2 jellybean XXLPZ firmware.If you liked the article then take two minutes to share it.

Update AT&T Galaxy S2 I777 With Android 4.1.2 Jellybean UCMD8 Firmware

Samsung and AT&T has recently released the android 4.1.2 jellybean update for the AT&T galaxy S2 I777.The AT&T galaxy S2 received this jellybean update after a long time.The jellybean firmware was first released in Germany and now every user of the AT&T galaxy S2 can update their smartphones by using the KIES OTA.In this tutorial you will know how to install the official android 4.1.2 jellybean UCMD8 firmware on galaxy S2 I777.We will manually update the AT&T galaxy S2,manual updation is required if you haven't received the update in your country but still possess the AT&T galaxy S2 I777.

att galaxy s2 jellybean

What's New In The Jellybean UCMD8 For AT&T Galaxy S2
  • HDR video.
  • Purple effect on screen removed.
  • Secure boot status.
  • Move apps to sd.
  • New camera firmware.
  • New icons in settings.
Pre-Installation Guide
Before you manually update your phone you need to read the guidelines stated below very carefully to successfully update the phone.

  • This tutorial can be applied on the AT&T galaxy S2 I777 only and can't be applied on other galaxy devices to prevent bricking.
  • You don't need to root your galaxy S2 because we are installing the stock Samsung jellybean rom which is not a custom rom,so there is no need to root your phone.
  • If you have already rooted your phone then after after flashing the rom your galaxy S2 I777 will return to its normal state and will lose root access completely.
  • Backup all the important data stored on your phone like messages,android apps,bookmarks,contacts etc.Otherwise they will be wiped.
  • Enable USB debugging by going to Developer options settings.
  • The battery of your phone should be fully charged.
  • Whatever you are doing is at your own risk,so anything that happens wrong with your phone,you can't blame us for it.
Files You Need

  • Odin v3.07.Get it here
  • Samsung USB drivers.Download
  • AT&T Galaxy S2 I777 Android 4.1.2 Jellybean UCMD8 Firmware.Download
How To Update AT&T Galaxy S2 I777 With Android 4.1.2 Jellybean UCMD8 Firmware


  • Download and install the Samsung USB drivers for mobile phones from the above link.
  • Dwonload odin 3.07 and I777UCMD8 firmware zip and extract both files in separate folders.
  • Now launch odin.exe from the folder where you extracted it.
  • Switch off your phone and connect it to pc via usb cable.Now reboot galaxy S2 I777 into download mode by pressing the volume up,volume down and the power button at the same time.
  • Don't release the buttons unless you see a warning screen on your phone.Press the volume up button to continue going into download mode.
  • When your galaxy S2 gets into download mode then odin will take few seconds to recognize it and when its done then field under "ID:COM" in odin will turn blue.Also in message you will see "<ID:0/016> Added!!".This means your galaxy S2 I777 is ready for flashing.
  • Make sure in odin the "Re-Partition" option is unchecked and the "Auto Reboot" and "F. Reset Time" options should be checked.


  • Now put a check mark in front of PDA.Click the PDA button and browse for the I777UCMD8 firmware file that you extracted in a folder.This file is I777UCMD8_I777ATTMD8_ATT.tar.md5.Load this file into odin.
  • Now click the Start button to update your AT&T galaxy S2 to android 4.1.2 jellybean.
  • Odin will take few minutes to install jellybean files on your AT&T galaxy S2 I777.
  • After the installation odin will return a "Pass" message and your galaxy phone will reboot automatically.You can now disconnect it from pc.
  • You have successfully installed the android 4.1.2 jellybean on AT&T galaxy S2 I777.
Quick Troubleshooter

  • If odin gets stuck during updating process then close it and disconnect your phone from pc.Remove the phone's battery and put it again after few seconds then reboot it into download mode by pressing home,power and volume down key at the same time.
  • Launch odin.exe and connect your galaxy S2 to pc and repeat the update procedure.
  • If after updating you galaxy S2 freezes or hangs or gets stuck at the samsung boot animation.Then remove its battery then again put it and reboot in recovery mode.
  • To reboot into recovery mode press volume up,volume down and power key at the same time.Don't release buttons until you see the recovery mode.
  • Move down and select "wipe data/factory reset".
  • The device will be wiped and factory reset.Then go back and select “wipe cache partition”.
  • Now go back and select "reboot system now".
  • Now your AT&T galaxy S2 I777 should restart and work without any lags or problems.
Now your AT&T galaxy S2 I777 is updated with android 4.1.2 jellybean UCMD8 firmware.

Use Authenticator App To Enable 2-Step Verification On Facebook

Adding 2-step verification to your facebook account adds an extra layer of security which makes it difficult for anyone to break into your account.2-step verification is the best way to defend your facebook account as someone can steal your facebook password but he can't break the 2-step verification.Like google,microsoft,and apple facebook is also providing us the feature of 2-step verification to secure our accounts from hacking.

In 2-step verification you need to verify yourself twice as the legitimate owner of your facebook account.First you login with the password and then you need to enter 2-step verification codes either generated by authenticator app or sent to you by facebook on your mobile phone via sms.You need to enter this code to successfully login into your facebook account.There is no way to bypass 2-step verification.

In this tutorial I will teach you how to enable 2-step verification for your facebook account by using an authenticator app and a sms.Android users will use google authenticator and windows phone users will use microsoft authenticator for this purpose.These authenticator apps are available free to download in their respective app stores

Use Authenticator App To Enable 2-Step Verification On Facebook
I am using google authenticator for android to set up 2-step verification on facebook,because the process is same for windows phone 8.You need to download one more app called "Scan".This app will be used to scan the 2d/qr code during the 2-step verification setup.This scan app is also available free to download in google play and windows phone app store.

  • Download and install the respective authenticator app and the scan app for your android or windows phone.
  • Goto "http://www.facebook.com/settings" and login in to your account.This will directly take you to the settings section.
  • In settings click "Security" on the left side.On the right side under "Security settings" click "Code Generator".
  • Now click "Set up".A popup will open and you will see a qr code with a verification key.You need to scan this qr code with the Scan app.Make sure to enable data connection on your phone before scanning the qr code.


  • When you scan the qr code with scan app a popup will open in your android phone/windows phone asking you to "Save key for Facebook".Click ok to save the key.
  • Now in authenticator app you can see random codes are generating under the name Facebook.Now pick any random code generated by this authenticator and enter the code in the facebook 2-step verification setup and click confirm.


  • Now your facebook account is secured with 2-step verification.
Now whenever you login from an unknown device which is a phone or a pc which you haven't used before to login in to your facebook account then facebook will ask you to enter the verification code generated by this authenticator app.Without entering the code no one can log in to your facebook account.

You can check out following 2-step verification tutorials for
Share this article if you like it.

Enable Login Notifications To Find Out Who Is Logging Into Your Facebook Account

Do you have a doubt that somebody is logging in to your facebook account and you are not aware of it.Then you want to know who may be doing this.That person can be anybody like your best friend,your mom or your elder brother or sister.If you want to know who logs in to your facebook account then you need to make it secure against these kind of attacks.By enabling login notifications on facebook you will be able to know who logs into your account without your consent.

Login notifications is facebook's security alarm which notifies you about the login activity when someone logs into your account from any computer,mobile device or the facebook app.You will be notified about the suspicious facebook login activity through a sms on your registered facebook mobile and an email sent to your registered facebook email account.Also you will get the suspicious login notification when you log in to your facebook account.

Enable Login Notifications On Facebook To Find Out Who Is Logging Into Your Facebook Account

Part 1 : Setup Your Mobile Phone Number

  • First you need to register your mobile phone number with facebook to get login notifications via sms.You should not ignore this step because it is the best method to receive notifications and you can do the needful to defend your facebook account.
  • To register your mobile phone go to "http://www.facebook.com/settings" and login into your account.When you login you will be directly taken to the settings page.
  • Now click "Mobile" on the left side and click the green button "Add a Phone".
  • Now a popup will open click "add your phone number here".See the image below.


  • Enter your mobile phone number to receive the confirmation code.On receiving the code enter it into facebook to verify the mobile.Change the visibility to "Only Me".
  • Now your mobile phone is set to receive login notifications via sms messages.
Part 2 : Enable Login Notifications On Facebook

  • On the same settings page click "Security".Then click "Login Notifications" on the right side.
  • Check "Email" and "Text/Push notification".then click save changes.
  • Now whenever anybody logs in to your account (including you) you will receive sms messages about the login activity.
  • For detailed info you should check the email sent to you by facebook.
Part 3 : Find Out Who Logged Into Your Facebook Account

  • Login into your email account that is registered with facebook.
  • Open an email stating that "Facebook login from an unrecognized device".
  • This email contains the information about the person who logged into your account.The info includes the ip address of that person's computer,its geographic location in form of city and country,browser and operating system.
  • If that person is not using a proxy then you can easily find him by tracing his ip address.See the image below.


  • Now goto "http://www.ip-adress.com/ip_tracer/".Scroll down a little and enter that ip-address and click "Track IP" button to get the information about that ip address.You will get its location and internet service provider.

Part 4 : Find Out Who Is Accessing Your Facebook Account In Real Time

  • In settings click "Security" then click "Active Sessions".
  • Active sessions will show you the information of users who are currently active on your facebook account i.e. accessing your account.
  • There should be only one active session and that is you.It will show your location in active sessions.
  • If you find that there are more than one active sessions in your facebook account then your account may be compromised.Change your password immediately.
If your facebook account is hacked then you can see how to get it back here.

How To Update Samsung Galaxy S4 I9505 To Official Android 4.2.2 Jellybean XXUBMEA OTA Firmware

The Samsung Galaxy S4 I9505 snapdragon version has received a new android 4.2.2 OTA update in Germany.The new update is android 4.2.2 XXUBMEA.The new update comes with improved performance and is available for snapdragon 600 galaxy S4 phones in Germany.Samsung rolled out this update quickly as to fix some bugs that were present in the first version of galaxy S4.Also the new update has received a new feature which is "apps to sd card".You can move apps to sd card in galaxy S4 after updating with XXUBMEA firmware.In this new update the user accessible space for installing android apps on galaxy S4 is increased by around 80 MB.


Whats New In The XXUBMEA Firmware


  • New Camera firmware.
  • Smearing issue has been fixed (Purple effect while scrolling).
  • Smart Pause Toggle in notifications slider.
  • Move Apps to SD Card.
  • HDR Video recorder.
  • Semi-transparent status bar.
  • New Icons in Settings.
  • Secure boot status.
  • Increase legibility on Super AMOLED display.
In this tutorial I will teach you to install this update on your galaxy S4 I9505 only.If you are out of Germany and have this model of galaxy S4 then you can manually update it with android 4.2.2 jellybean XXUBMEA by using odin.But do read the following instructions first.

Important Guidelines

  • This tutorial can be applied on the snapdragon 600 galaxy S4 phones I9505.Do not use it with any other model.
  • Backup all the data stored on your phone like android apps,messages,contacts,photos etc.Use SmsBackupAndRestore to backup sms messages,use androzip to backup android apps,copy your photos to sd card for backup.
  • There is no need to root your galaxy S4 because we are updating it with stock jellybean rom.
  • If your device is rooted then after updating it the root access will be revoked and your galaxy S4 will be unrooted again.
  • Enable USB debugging by going to  "Settings>More>Development Options >USB debugging".
  • Battery should be charged upto 50%.
Warning And Damage Liablility
By following the above tutorial you are taking the damage liablity yourself which means that we can't be held responsible if your galaxy S4 gets bricked or you loose important data if you didn't make a backup.

Files Required

How To Update Samsung Galaxy S4 I9505 To Official Android 4.2.2 Jellybean XXUBMEA

  • Download and install the samsung usb drivers.
  • Download and extract odin to a folder.Also download and extract the XXUBMEA firmware file to pc desktop.
  • Now switch off your galaxy S4 and reboot it into download mode.You can see how it happens here.
  • Now launch odin.exe from the folder where you extracted it.
  • Now when you see an android logo on your galaxy S4 stating "Do not turn off target" then connect it to your pc via usb cable and let odin recognizes it.
  • When the device is recognized the field under "ID:COM" section will turn blue.Also in message you will see "<ID:0/016> Added!!".This means your galaxy S4 I9505 is ready for flashing.
  • In odin under options menu the "Auto Reboot" and "F. Reset Time" options should be checked and do not check the "Re-Partition" option.Also put a check mark in front of PDA.


  • Now click the PDA button and browse for the XXUBMEA file named as "I9505XXUBMEA_I9505OXABMEA_DBT.tar.md5".Load this file into odin.
  • Now hit the start button to start flashing your galaxy S4 with I9505XXUBMEA OTA firmware.It will take few minutes to complete.
  • After updation odin will return a message "Pass" and your phone will auto reboot.You can now disconnect it from pc.
  • Now follow the phone's wizard to set it up.
  • Now your galaxy S4 is updated with latest android 4.2.2 jellybean.Now experience the new features.You will see an internal increase in phone's storage by 80 MB.
Quick Troubleshooter

  • If odin gets stuck during updating process then close it and disconnect your phone from pc.Remove the phone's battery and put it again after few seconds then reboot it into download mode by pressing home,power and volume down key at the same time.
  • Launch odin.exe and connect your galaxy S4 to pc and repeat the update procedure.
  • If after updating you galaxy S4 freezes or hangs or gets stuck at the samsung boot animation.Then remove its battery then again put it and reboot in recovery mode.
  • To reboot into recovery mode press volume up,home and power key at the same time.Don't release buttons until you see the recovery mode.
  • Move down and select "wipe data/factory reset".
  • The device will be wiped and factory reset.Then go back and select “wipe cache partition”.
  • Now go back and select "reboot system now".
  • Now your galaxy S4 I9505 should restart and work without any lags or problems.
Now you have successfully installed the android 4.2.2 jellybean XXUBMEA OTA firmware update on your galaxy S4 I9505 smartphone.

If this article helped you then please take 2 minutes to share it.

How To Backup,Restore And Transfer Whatsapp Messages From One Android Phone To Other

A majority of android users is now using whatsapp.Well whatsapp is an android app that is widely used by android users for instant messaging and file sharing.Whatsapp has replaced the traditional sms messages of the phone today.Whatsapp is easy to use,you can learn more about it here.In this tutorial I will teach you to backup,restore and transfer whatsapp messages from one android phone to another android phone.

How To Backup Whatsapp Messages On Android


Backing up whatsapp messages is good as you will have a message database that you can restore anytime on your android.Whatsapp backup is required is your message list is huge and you want to save some space on your phone.The backup file can be stored on your pc and the android phone itself.Follow the steps below to backup and restore whatsapp messages.

  • Open Whatsapp and click the menu button of your phone and click "Settings".
  • Now select "Chat settings" and click "Backup conversations".
  • Your message history will be backed up on your phone's sd card.
  • The message backup database can be found in sd card>WhatApp>Databases>msgstore.db.crypt.
  • This msgstore.db.crypt is the backup of your whatsapp messages.

How To Restore Whatsapp Messages On Android


Now you want to restore the whatsapp messages on the same android phone you used previously.To restore the messages follow the steps below.

  • First of all backup the whatsapp android apk to your sd card.You can see how to backup android apps here.
  • After backing up the app uninstall whatsapp from your android phone.
  • Now re-install the whatsapp apk again. You can download the latest version here
  • Now follow the app's instructions.Enter the same mobile number and do not use a new one.After few seconds you will see a page in which whatsapp will ask you to restore your messages.See the image below.Click the "Restore" button.

whatsapp chat history restore

  • Now your messages are restored and can be easily seen within whatsapp.
Note : Contact numbers deleted from your phonebook after the backup will be visible in the app after restore.You can save their contact numbers again or delete their messages.

How To Trasnfer Whatsapp Messages From One Android Smartphone To Other Android Smartphone


Before transferring your whatsapp messages from one android smartphone to other you should be careful about the mobile number that do not use same mobile number on two different android phones,otherwise your whatsapp account associated with that mobile number will be banned or blocked.If you are transferring your messages on a new android phone then make sure that it should have a different mobile number,or if you are using the same number then put that sim in the new android phone.Now proceed as follows.

  • On your new android phone's sd card make folder directory like this WhatsApp>Databases.
  • Now put the msgstore.db.crypt backup file in the "Databases" folder you created in the above step.
  • Now install whatsapp and follow the instructions given by the app.Make sure to enter a different mobile number on new android phone.If you want to use the old number then move that sim to new android phone.
  • After few seconds you will see a page in which whatsapp will ask you to restore your messages.See the image below.Click the "Restore" button.
  • Now your whatsapp messages has been transferred from your old android smartphone to new android smartphone.
If you liked the article then take 2 minutes to share it.

How To Update Samsung Galaxy S2 I9100 To Official Android 4.1.2 Jellybean

Recently Samsung rolled out the android 4.1.2 jellybean update for the galaxy S2 I9100 for the Europe,UK and the Ireland region.The galaxy S2 can be updated via KIES through OTA update.The jellybean update can be installed on any international version of galaxy S2.In this tutorial we will be installing the official android 4.1.2 jellybean rom on galaxy S2 by using odin.If you have the international version of galaxy S2 then you can apply this method to update your device to android 4.1.2 jellybean without using Samsung KIES.You don't need to root your phone because we are installing the official jellybean Samsung rom on galaxy S2.


Useful Instructions
Before installing android 4.1.2 jellybean on your galaxy S2 GT-I9100 you should read the following instructions carefully otherwise it may cause damage to your phone.

  • Before updating your phone backup entire data otherwise you will lose it.Update the phone at your own risk and we can’t be held responsible if something goes wrong or if the device gets bricked.
  • Use Android Assistant to backup all the android apps stored on your phone.Check this tutorial to backup android apps.
  • Backup your contacts list otherwise they will be lost.
  • Use SmsBackupAndRestore to backup all sms messages on sd card then save it on pc.
  • Backup all data stored in phone’s storage and save it on pc otherwise lost.
  • If your device is rooted then after installing the stock rom the root access will be revoked and you will have to re-root it again.
  • Enable USB debugging on galaxy S2.For android 2.3 goto Settings>Applications>Development>USB debugging.If you are running android 4.0 then open Settings then goto "Developer options" and select USB debugging.
  • You should install Samsung USB drivers for android smartphones on your pc or KIES otherwise odin will not recognize your phone.
  • Your phone's battery should be charged to atleast 70 percent.
Warning : This tutorial is meant to be applied on Samsung galaxy S2 I9100 only and should not be applied on any other version of galaxy S2,because you may end up with a bricked device.So don't blame us if you do that.If the update is available in your country then use KIES otherwise you can use this tutorial if and only if you have GT-I9100 version of galaxy S2.

Downloads

  • USB drivers for galaxy S2 I9100 download.
  • ODIN v3.07 get it here.
  • Official android 4.1.2 jellybean rom for galaxy S2 Europe region download.
  • Official android 4.1.2 jellybean rom for galaxy S2 UK region download.
  • Official android 4.1.2 jellybean rom for galaxy S2 Ireland region download.

Update Samsung Galaxy S2 I9100 To Official Android 4.1.2 Jellybean XWLSW
In the download sections I have provided download links to three stock android jellybean roms for galaxy S2 I9100.You can download one of them according to your region.I will show the process for Europe region rom as the process is same for UK region and Ireland region.

  • Download and install Samsung USB drivers from the above link.Also download the ODIN v3.07 and extract it on desktop.
  • Now download one of the roms provided above.I am using the official jellybean rom for galaxy S2 in Europe region.Extract the file to your pc's desktop.
  • Now turn off your galaxy S2 and reboot it into download mode by pressing the home,power and volume down buttons at the same time.Don't release the button until you get a vibration from the phone.
  • You will see a warning message to install the custom rom.Press the volume up button to proceed and enter into download mode.


  • Now open odin.exe and connect your galaxy S2 to pc via USB cable.Let odin to identify your phone.
  • When you connect the phone in download mode to odin then the field under the "ID:COM" in odin will turn blue and show you the connection ID.Also in message you will see "<ID:0/016> Added!!".This means that your galaxy S2 I9100 is now ready for flashing android jellybean 4.1.2.

  • Make sure to check only "Auto Reboot" and "F. Reset Time" options.Do not check other options
  • Now put a check in front of "PDA" then click "PDA" in odin and browse the android jellybean 4.1.2 rom file which you have downloaded this file name is "I9100XWLSW_I9100XEULS5_XEU.tar.md5".Load this file in PDA it will replace the old rom.
  • Now click "Start".You will see progress in the progress bar above ID:COM.
  • After completion your galaxy S2 will auto rebo I9100ot and start with latest android 4.1.2 jellybean update.

What If Odin Gets Stuck
If odin gets stuck during the update process then you need to restart the whole procedure.Just close everything specially odin.

  • Open windows task manager and under "Processes" tab check if odin is running.If it running then click it and then click end process.Now restart odin.exe.
  • Remove your phone's battery and again re-install it after few seconds and directly reboot it into download mode.
  • Connect it to pc and repeat the upgrading process.
  • This problem is rare if everything is ok.
Galaxy S2 Hangs And Freezes After Upgrading To Android 4.1.2 Jellybean
Now after updating galaxy S2 to official android 4.1.2 jellybean,you may encounter some problems that phone hangs and freezes and it doesn't go beyond the samsung boot screen or the galaxy S2 became very slow.Then follow the steps below.

  • Remove the phone's battery and put it back again after 2 seconds.
  • Reboot galaxy S2 into recovery mode by pressing volume up,power and home button at the same time.Don't release the buttons until you see the recovery mode.
  • You will see few options here and you can move up and down by using the volume buttons.
  • Move down and select "wipe data/factory reset".
  • The device will be wiped and factory reset.Then go back and select “wipe cache partition”.
  • Now go back and select "reboot system now".
Now you have successfully installed the official android 4.1.2 jellybean XWLSW rom on your galaxy S2 I9100.

If you enjoyed the article please take 2 minutes to share it.