This Domain Name Is Up for Sale
Contact Us

Computer Shuts Down Automatically: Fix Faulty Power Supply

If your computer PC shuts down unexpectedly then this is an indication that the power supply(SMPS) is losing its efficiency and is not capable of providing sufficient power to motherboard and the peripherals and internal components. SMPS stands for ‘Switch Mode Power Supply’ which is an electrical unit located at the back side of your pc’s cabinet. Its work is to convert dangerous AC voltage to safe low voltage DC output which is about 12V for motherboard. The SMPS efficiency is reduced by 20% every year and that’s why the output DC voltage drops reaching to a point at which the motherboard can’t operate due to insufficient power delivered by your old power supply.

pc power supply

Why PC Shuts Down Automatically
As I stated above when a power supply fault occurs that could be overvoltage or under-voltage condition then your computer’s motherboard sends a safety signal to the SMPS to turn down the system to protect it from damage. This is actually not a motherboard fault but is a defect of the power supply unit. The motherboard is intelligent enough to detect overvoltage and under-voltage conditions and guards the computer by sending a shutting down signal to the SMPS unit. This behavior is normal when the power supply unit is found to be defective.

Fix The Faulty Power Supply Till Replacement
If you are encountering this random shut downs on your PC then I will tell you a trick with which the PC won’t shut down unexpectedly. This trick lets your PC to consume less power and it will run on the low voltage provided by the faulty power supply unit. However this is not the permanent fix to correct the SMPS, this trick is only suitable till the time you buy a new power supply unit for your computer. To make your PC run on low power follow the steps below.

  • Goto control panel in Windows 7 and choose ‘Power Options’.
  • Now choose ‘Power saver’. Power saver mode will reduce your computer’s performance wherever required and let it to consume less power.


  • Now click ‘Change plan settings’ then click ‘Change advanced power settings’.
  • The ‘Advanced settings’ for power options will open.
  • Scroll down and expand ‘Processor power management’, then expand ‘Maximum processor state’. Under this click ‘Setting’ and change the processor state from ‘100’ to ‘40%’.
  • Now the CPU will run on low power and won’t be used by more than 40%.

Note : This will reduce your computer’s performance greatly as you have under clocked and under volted your PC’s CPU. You will see that your PC is now performing slower. So this is not a permanent fix, replace the power supply unit as soon as possible, I recommend Cooler Master brand, you can check Upgrade power supply of Desktop PC. After installing the new power supply unit restore the ‘Power options’ to default otherwise the computer would not perform at its maximum.

Check The Voltage Output Of A PC Power Supply Unit
With CPUID you can check the right voltage values of your SMPS. The CPUID is a hardware monitor software that also monitors system voltages. So the 12V power output should be 9.5V or greater. If you find below 9.5V then its time to replace the unit. See the image below.


Reasons To Buy Moto G Android Smartphone

Motorola Moto G is the cheapest android smartphone that can be upgraded to android 4.4.2 kitkat OS. This phone was first launched in the United States (USA) in November 2013 with no contract for the 8 GB model. Moto G is launched with a tagline ‘exceptional phone exceptional price’. The words are right said for the Moto G because it is such an exceptional phone with an exceptional price. Moto G is the cheapest android smartphone that runs on android 4.3 jellybean out of the box and can be upgraded to android 4.4.2 kitkat.

Moto G has exceptional features that can’t be found in other android smartphones of brands like Samsung. Samsung is known to make android smartphones in every price range that is low, mid and high. But Samsung has no smartphone till date that runs on android 4.3 jellybean and can be upgraded to android 4.4.2 kitkat. Samsung’s mid range smartphones are just limited to android 4.2 jellybean only.

It is not bad to say that Moto G has similar specifications as of Galaxy S3 which is twice costlier than Moto G, and also Moto G’s performance is similar to Galaxy S3, but Galaxy S3 has a slightly better processor while Moto G has a slightly better GPU than S3.

After Motorola, LG has announced its L Series 3 smartphones that will run on android 4.4 kitkat. The LG L Series 3 includes 3 smartphones L90, L70 and L40. Only LG L90 has similar specs as Moto G. But LG L90 has an outdated screen resolution which is just qHD and is not as bright and sharp and do not have high ppi as Moto G. The only advantage of LG L90 over Moto G is that it has 2540 mAh battery which holds more juice(charge) than Moto G’s non removable lithium ion battery. Moreover the LG L90 price will be either similar to or higher than Motorola Moto G. But Moto G still holds the ground when it comes to buy an android smartphone with exceptional features having exceptional price.

Now I am going to tell you why buying a Moto G is a wise decision if this is your first android smartphone or you already coming from android background. So below are some reasons why to buy this phone.

Reasons To Buy Motorola Moto G


1. Price: Motorola Moto G is the cheapest phone running latest android OS that is android 4.4 kitkat, the 8 GB model is priced at only $200 dollars or 12499 INR. No other phones have android kitkat at this price range. Even Samsung has not launched any phone with kitkat OS in this price group ($200). So if you are low on budget($200) and want an android smartphone that runs on Google’s android kitkat 4.4 OS then this phone is for you. It runs the official kitkat OS with no customizations.

2. HD IPS Display: When you first put your hands on any phone, the first thing that you put your eyes on is its screen. Moto G has 4.5 inch HD IPS display with a resolution of 1280x720 and have 329ppi pixel density and 16M colors which is even higher than Galaxy S3. So Moto G has the sharpest and the brightest screen with IPS display and corning gorilla glass 3 protection. HD IPS display at 329ppi is eye catching. The big screen is best suited for reading ebooks and websites.

3. Quad Core CPU: Moto G has MSM8226 snapdragon 400 chipset with 1.2 GHz quad core cortex A7 CPU. Dual Core Snapdragon 400 is proved more powerful than other quad core processors. Moto G has a quad core processor which is enough to run multiple apps at the same time. Because of processor being very fast you can run all HD android games on this phone without lag and hanging the phone. A listed of games tested on Moto G is given below.

  • Asphalt 7
  • Asphalt 8
  • Dead Space
  • Modern Combat 4
  • GTA 3
  • GTA Sanandreas
  • GTA Vice City
  • Gangstar 4 Rio
  • NFS Most Wanted
  • Street Fighter IV HD
  • Sim City
  • Playstation 1 Games on Moto G via FPSE. You can the tutorial here.
  • MAME Games on Moto G. Check tutorial here.
  • NeoGeo Games. Check this tutorial.
  • Virtual Tennis
  • CSR Racing 2
  • Sonic 4 Episode 1&2
  • Puddle HD

4. GPU: Moto G has Adreno 305 GPU single core clocked at 450MHz which is slightly powerful than MALI 400MP. You can play all android games on it. As I have mentioned the list of games that I have tested on Moto G. Even graphics intensive games like Modern Combat 4 runs smoothly on Moto G.

5. RAM/Memory: Well Moto G has 1GB RAM which is enough to run all the android apps that you like. More RAM means faster performance without lags. 1GB RAM coupled with snapdragon 400 processor means no performance bottlenecks in this phone.

6. Battery: This smartphone has 2070 mAh battery which can give 24 hours backup with normal usage and it fully supports USB OTG with which you can connect pen drives, flash drives, mouse and keyboard to your Moto G via OTG cable. You can check the USB OTG tutorial.

7. Notification Light: The presence of notification light makes it easier to get notification alerts when the screen is off. Moto G has a notification light that blinks every time you receive a call, message and whatsapp notification. With the presence of this notification light you won’t miss any notification(call, sms or whatsapp notification).

8. Camera: This phone has 5 MP rear HDR camera with LED flash which can record 720p HD videos at 30 fps. The front camera is 1.3 MP. Camera features include 4x Digital Zoom, slow motion video, burst mode, auto HDR, panorama and touch to focus

9. Dual Sim: Moto G is dual sim enabled which is a common feature found in most smartphones today.

10. Internal Storage: Moto G comes in two variants 8GB and 16GB. So you can buy this phone according to your storage requirements. The 8GB model has upto 5GB space that is user accessible while the 16GB model may have upto 12GB space that is user accessible. It doesn’t have a sdcard slot so the storage is not expandable, that may disappoint you. But don’t worry, Moto G is blessed with USB OTG feature so you can directly connect pen drives, flash drives to it and for more convenience you can use Transcend Jet Flash 510 or Jet Flash 380 USB OTG flash drive for android.

11. Motorola Migrate: Motorola Migrate can easily move your iPhone or Android stuff to your new Moto G. And, it only takes a few steps.

12. Sensors: Moto G has sensors like Magnetometer, Proximity Sensor, Hall Effect Sensor, Ambient Light Sensor, and Accelerometer. It doesn't have barometer, temperature sensor and gyro sensor which is useful in some android games, but there is no need as all games will run perfectly.

Moto G Accessories

Moto G supports following accessories.


  • Power Pack Slim : The power pack slim for Moto G is an external power bank that comes in two variants 2000mAh and 4000mAh. It’s a portable battery power bank that can be used to charge the battery when its low.

4000mAh power bank for moto g

  • Interchangeable Back Panels : Moto G have 7 interchangeable colored back panels that make you feel that you are using a new phone everytime you change them.

colored back panels for moto g

  • Motorola Grip Shells : Motorola Grip Shells feature a rubberized frame for extra grip and protection against impact. Smooth curves make your Moto G feel extra comfortable.


  • SOL REPUBLIC JAX Headphones : These are for vivid and clear sound, best suited for FM music and match the color of your Moto G.
  • JBL Micro Wireless Speaker : Streams awesome audio directly from your Moto G.

Motorola Moto G Benchmarks
Phone
Quadrant
AnTuTu v4.0
Vellamo
NenaMark 2
Moto G
8082
16944
HTML5-1970
58 fps
Xperia M
4226
11168
HTML5-1817
64.0 fps
Galaxy Core
3054
7470
HTML5-1328
33.2 fps

All the above android smartphones have similar prices and you can see that Galaxy Core has worst benchmark scores and its price is same as of Moto G. So no matter Moto G is the best android 4.4.2 Kitkat smartphone in $200 dollars.

Password Protect and Encrypt USB Drives : No Software Needed

USB drives are portable storage devices that carry your data wherever you want. To protect the data stored in the usb drives you need to lock the drive by installing a password. After installing a password the unauthorized access to your data is restricted. In this tutorial I will teach you to encrypt and password protect any USB storage device like pen drives, micro SDcards, external hard disk, and internal hard disks and you can do this without any software. To password protect any USB storage device we can use ‘BitLocker Drive Encryption’ which is built in Windows 7, Windows Vista and Windows 8.

lock pen drive

BitLocker is a drive encryption application developed by Microsoft for Windows 7, Windows Vista and Windows 8. The Bitlocker uses AES encryption method which is very difficult to break. The Bitlocker also generates a 128 bit or 256 bit backup key in case you forget your password then this key will unlock the encrypted drive. You don’t need any additional software but a Windows 7 or Windows 8 pc and a USB storage device like pen drives, flash drives, and external hard disks (portable HDDs).

How To Password Protect Any USB Storage Device With Bitlocker Drive Encryption

  • Connect the USB drive to pc. Right click on it and choose ‘Turn on BitLocker’.
  • Let bitlocker to identify the drive.
  • Now check ‘Use a password to unlock the drive’.


  • Type the password two times in both the fields.
  • Click ‘Next’ to proceed.
  • In next step click ‘Save the recovery key to a file’ and save it wherever you want. It’s a text file so you can take a print (hard copy) of it and put it somewhere in a safe location. If you forget the password then this key is the only way to unlock your usb storage device.
  • Now click ‘Next’ then click ‘Start Encrypting’.
  • Wait for few minutes till the encrypting process finishes.
  • Now remove the usb drive and plug it again. This time you will need to enter password to unlock it and access the data.

Now your USB storage devices are password protected and encrypted with AES encryption done by bitlocker drive encryption and you haven’t used any additional software like truecrypt, usb safeguard.

Manage Bitlocker Drive Encryption

1. Change Password : To change unlock password right click on the drive and choose ‘Manage Bitlocker’. This will only work when the drive is unlocked. After clicking ‘Manage Bitlocker’ choose ‘Change password to unlock the drive’. Now enter the new password and click “Next”.


2. Auto Unlock On Any Computer : When ‘Auto Unlock’ is enabled for specific computer then you will not be asked to unlock the pen drive. But this will work only on the computer on which is enabled. To enable auto unlock go to Bitlocker manager as in step one and choose ‘Automatically unlock this drive on this computer’.

3. Turn Off Bitlocker For Any USB Drive : If you no longer want to use bitlocker then you can disable it forever. To do this first unlock the pen drive with password and go to ‘Bitlocker Drive Encryption’ in control panel. Choose ‘Turn off BitLocker’. A popup will open and choose ‘Decrypt drive’. It will take some time to turn off bitlocker. To immediately turn off bitlocker just format the USB storage, this will remove bitlocker instantly, but also this will delete all the files in the pen drive and can’t be recovered. So do this only if you no longer want the files.


Now you have successfully password protected your USB drives, external hard disks and micro SDcards.

Download GeForce 334.67 Beta Driver For NVIDIA Notebooks

NVIDIA has recently released GeForce 334.67 Beta Driver for notebooks. This new driver has improved 3D and SLI profiles and game ratings. The new NVIDIA GeForce 334.67 beta driver ensures improved performance and stability.

geforce logo

Details Of GeForce 334.67 Beta Driver For NVIDIA Notebooks

Version : 334.67 - BETA
Released :  Mon Jan 27, 2014
Operating System : Windows 7 64-bit, Windows 8.1 64-bit, Windows 8 64-bit
Language : English (US)
File Size : 263.45 MB

GeForce 334.67 Beta Driver Download

What's New In GeForce 334.67 Beta Driver

  • Installs new PhysX System Software 9.13.1220
  • Installs HD Audio v1.3.30.1
  • Installs GeForce Experience 1.8.2
  • Includes support for applications built using CUDA 5.5 or earlier version of the CUDA Toolkit. 
  • Supports DisplayPort 1.2 for GeForce GTX 600 series GPUs.
  • Supports OpenGL 4.4 for GeForce 400-series and later GPUs.
  • Supports multiple languages and APIs for GPU computing: CUDA C, CUDA C++, CUDA Fortran, OpenCL, DirectCompute, and Microsoft C++ AMP.
  • Supports single GPU and NVIDIA SLI technology on DirectX 9, DirectX 10, DirectX 11, and OpenGL, including 3-way SLI, Quad SLI, and SLI support on SLI-certified Intel and AMD motherboards.
Supported NVIDIA GPUs

Following GeForce Notebook GPUs are supproted by this driver

  • GeForce 800M series, 700M, 600M, 500M, 400M, 300M, 200M, 100M, 9M, 8M, ION and ION LE notebooks.
  • NVIDIA GeForce 720M is fully supported.
Share your experience after downloading and installing the NVIDIA driver.

How To Identify Fake Profile Pics And Cover Photos On Facebook, Google+ And Twitter

Facebook is a social networking site which have more than 80 Million users worldwide, while Google+ is a social network and identity service, and Twitter is a micro blogging site. Today we mostly use Facebook for connecting with friends and same applies to Google+. We make new friends on Facebook by just viewing their profile pic. If we like their profile pic then we send them friend requests, because the profile pic is the only thing that is visible to the public. So to know more about that person you should send a friend request. But you should not make unknown friends on Facebook because these people might be hackers or the persons who want to track you with your Facebook account.


You should investigate more about that person. The most easy way is to identify whether its profile pic is original or fake. Most people use the profile pic of most famous Hollywood actors that can be easily identified. But if the picture seems to be original and you still have a doubt then its better to investigate about it. I am telling you a trick through which you can identify fake profile pics on Facebook, Google+ and Twitter.

Identify Fake Profile Pics And Cover Photos On Facebook, Google+ And Twitter

  • Open your Facebook account and search for that profile.
  • Right click on that profile pic and select 'Search Google for this image'.
  • Google will show all the possible results about the picture.
  • Now you are intelligent enough and can say on the basis of Google search results whether that Facebook profile pic is original or fake.
  • You can apply the same procedure to check fake profile pics of Google+ and Twitter
If you like the article then please take 2 minutes to share it.

Download The Assassin's Creed IV Black Flag HD Wallpapers

Assassin's Creed 4: Black Flag is a 2013 historical action-adventure open world video game developed by Ubisoft Montreal and published by Ubisoft. You can download 5 HD desktop wallpapers of Assassin's Creed 4: Black Flag. Each HD wallpaper has a size of more than 4 MB. These wallapers can be downloaded in HD resolution of 3840x2160 pixels and are absolutely free.

Download The Assassin's Creed IV Black Flag HD Wallpapers

  • Caribbean Sunset
  • Mayan Temple
  • Providencia Vista
  • Sailing
  • Smuggler's Cave

Caribbean Sunset


Download 3840x2160

Mayan Temple


Download 3840x2160

Providencia Vista


Download 3840x2160

Sailing

The Assassin's Creed IV Black Flag HD Wallpapers

Download 3840x2160

Smuggler's Cave

The Assassin's Creed IV Black Flag HD Wallpapers

Download 3840x2160

Recover Photos, Videos And Other Files From Internal Memory Of Android Phones And Tablets

Today android phones are coming with built in storage with large disk spaces and the need of micro sd cards is going down day by day. We can address the internal storage of any android smart phone as internal memory card which is a nand flash memory chip fixed on phone’s motherboard. These chips can come in size of 8 GB to 64 GB and that is quite huge storage. Most people store their important data in the internal storage only and doesn’t use a sd card for backup, so if anything wrong happens they lose their important data.

So to avoid this problem always make a backup of your data and use sd cards instead of internal memory. If however you have lost your data that was on the internal storage of your phone then don’t worry because I am telling a you a way to recover your favorite photos, videos and other files from internal storage of your android phone. These tutorial applies to Samsung android phones, Sony Xperia android phones and all other phones having internal storage.

Very Important Note
If you have accidently lost all your files, photos and videos from your phone then after this do not copy new files to the phone. This also include clicking photos and capturing videos. If you copy new files to the phone then you are actually reducing your chances to get back your deleted photos and videos and other files. In short just don’t download anything to your phone, do not use the internet on your phone till the time when you get back your lost files back.

Note : This trick will only work on android phones having mass storage mode and MTP (Media Transfer Protocol) options. If your device is rooted then you can enable mass storage mode on your android phone. Samsung Galaxy S4 doesn’t have mass storage mode, but you can check how to enable mass storage mode in galaxy s4 in this tutorial. After enabling mass storage mode you can get back deleted photos, videos and all files from the internal storage of any android phone.

Requirements
1. Recuva for Windows 7, Windows 8 Download
2. A USB data cable.

Recover Photos, Videos And Other Files From Internal Memory Of Android

  • Download and install recuva. While installation do not uncheck any option.
  • Now connect your android phone in mass storage mode. Connect it to pc a notification will appear in the phone, tap it to enable mass storage.
  • Now open My computer and you will see ‘Removable disk’. 
  • Open recuva and click ‘Next’, on the next step ‘All Files’ will auto selected. Again click ‘Next’. Then choose ‘In a specified location’ and click ‘Browse’. Choose the ‘removable disk’ or ‘MTP’ disk here and click ‘Next’.
  • In next step put a check mark in ‘Enable Deep Scan’ and click ‘Start’.
  • After scan is finished you will see the list of all deleted files. Green circles is means that file can be recovered while red circle means unrecoverable file.
  • Now check the box next to ‘Filename’ to select all files. Click ‘Recover’ on the bottom right and choose ‘Desktop’ .Your deleted files will be recovered.


  • This trick can be applied on android phones running gingerbread, Ice cream sandwich and jellybean OS (rooted).
Now you have successfully recovered the deleted photos, videos and other files from the internal memory of android phones and tablets.

How To Play CPS2 Games On Android

CPS2 is Capcom Play System is an arcade system board which was popular during 90’s. It is the successor to all CP systems including CPS1, you can check how to play CPS1 games on android here. In this tutorial I will teach you to play CPS2 games on android with CPSEmu emulator for android.

Files Needed
1. CPSEmu 1.4 CPS2 emulator for android apk Download. For CPSEmu 2.0 click here.
2. CPS2 game roms Download
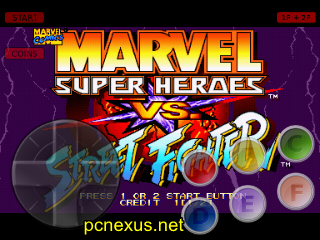
3. In this tutorial I will be playing Alien vs Predator and Marvel Super Heroes vs Street Fighter.

How To Play CPS2 Games On Android

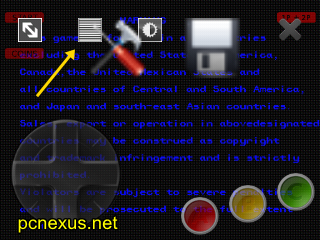
  • Download and install CPSemu apk and open it. Click the ‘Settings’ icon a hammer icon. Enable ‘Auto Frameskip’.


  • Now press the back button of your phone and close the app by tapping the cross icon on top right.
  • Now go to this directory ‘sdcard>CPSEmu’. Create a new folder here and name it as ‘roms’. And put all game roms in this folder.
  • Now open the app again and tap the game that you put in this folder.
  • Now CPSEmu will start creating a cache file before launching the game. After creating the cache file the game will start.
  • To start a game first tap the ‘Coins’ button then tap ‘Start’ or the yellow button.

Settings For CPSEmu Android Emulator

1. Disable Scanlines : To disable scanlines press the back button of your phone and tap the icon in image below. Then choose none.

2. Increase/Decrease Control’s Transparency : To increase or decrease controls transparency press the back button of your phone, tap the icon next to the floppy and increase or decrease the slider to manage the transparency.


3. Switch To Fullscreen : To play CPS2 games in fullscreen on your android tap the back button of your phone and then tap the arrow icon two times to enable full screen.


4. Save And Load A State : To save a game state in CPSEmu tap the back button of your phone and tap the floppy icon then again tap the floppy icon to save the game state. To load the saved game state tap one of the black rectangles below floppy icon. Black rectangles means saved states.


Note : Some CPS2 roms will give an error on CPSEmu android emulator as ‘File not found or CRC32 not correct. “CPU1”. When you see this error then this means the rom you downloaded has missing files and cannot be played. You should re-download that game from other sources.

File not found or CRC32 not correct. “CPU1” error cpsemu

Screenshots


marvel super heroes vs street fighter cps2 on android

alien vs predator cps2 android


Now you have learnt to play CPS2 games on android. Check this android gaming tutorial now.

How To Play GBA Games On Android

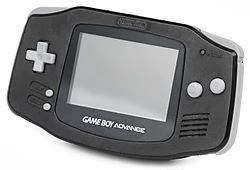
GBA stands for Game Boy Advance, it is a 32-bit hand held video game console manufactured by Nintendo and was released in 2001. This guide will let you know ‘how to play GBA games on android’ phone by using Gameboid android emulator which allows you to play almost any GBA game on android phones like pokemon. Some popular GBA games that I like are sonic advance, dragon ball z supersonic warriors, tekken advance

gameboid

First of all download the emulator to your android phone from the links below. I am providing Gameboid emulator apk and some game roms to play.

Downloads Required

  • Download GAME BOY ADVANCE emulator on android gameboid apk download
  • GBA Bios file download
  • GBA Roms : Download from emuparadise.


How To Play GBA Games On Android With GameBoid Emulator For Android

Now follow the steps below after downloading all the files from the above links to play gameboy games on android. This tutorial will teach you how to turn your android into a gameboy.

  1. Install the gameboid apk and put the game roms in a directory like “sdcard/MyGames”. Make a folder in your sd card and name it "MyGames". Put the bios and games in this folder.
  2. Put all the rom files in this folder.
  3. When you first open this app you will asked to set the GBA_BIOS file. Set the bios file from GBA folder.
  4. Now click the blue sd card icon on top left. Now move to “MyGames” folder. Open any game of your choice.
  5. Now game will run and you will see buttons and a 4 axis controller. Now you have to make appropriate settings for gameboid to play the games efficiently.


How To Setup GameBoid GBA Emulator On Android

1. Screen Orientation

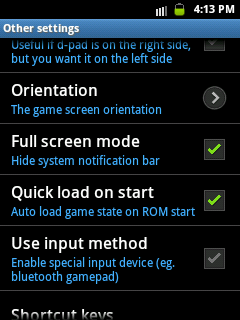
  1. Open gameboid a file explorer will open. Now click menu>settings.
  2. A settings page will open click “Other settings” and scroll down to “Orientation” and select “Landscape”. If “Fullscreen mode” is unchecked then check it.

2. Audio And Video Setings

  1. Now go back and click “Audio & Video settings”. Click “Scaling mode” and select “Stretched”. Then select “Aspect ratio” and choose “16:9”.
  2. Now scroll down and select “Max frame skips” and set to “0” and click ok.

3. Input Settings

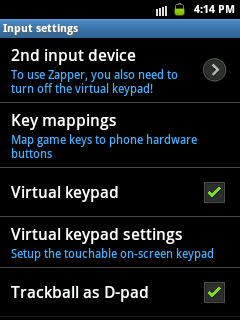
  1. Now go back and select “Input settings”. Click “Virtual keypad settings”. Uncheck “Vibrate on keypress”.

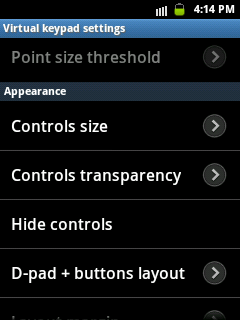
  2. Now select  “Controls size”. Select controls size according to your phone’s screen. For example if you are using galaxy note 2, galaxy note 3 then choose “Large” then click ok. For android phones having only 3 inch touchscreens choose “Medium”.

  1. Now click “Hide controls” and uncheck “Disable A/B  turbo”. If you uncheck this option then you will see four buttons on screen that is two normal and two turbo buttons.
  2. Now click “D-pad + buttons layout” and choose “Bottom+bottom”.
  3. Now click “Layout margin” and select 1 by sliding to left then click ok.
  4. Now go back until you see the game and start playing GBA games on android.

4. Load And Save A Game

At any time while playing the game you can save the game and later load it from where you left it. To save a game in Gameboid tap the menu button and choose 'Save'. Then choose any slot from slot 1-9 and an additional slot 'Quick' save. When you tap any slot the game will be saved.


To load a saved game state tap menu button and choose 'Load' and select the state from the list that you saved earlier. The game will load from where you left it.

5. Enable Cheats

If you any cheat codes for GBA then you can apply them in gameboid. Cheat codes help to gain unlimited money, coins and lives in any game. To apply a cheat code in gameboid. Follow the steps below.

  • Tap menu button and choose 'Cheats'.
  • Then again tap menu button and choose 'New cheat'.
  • Now enter name and the code and tap 'OK'.

Screenshots

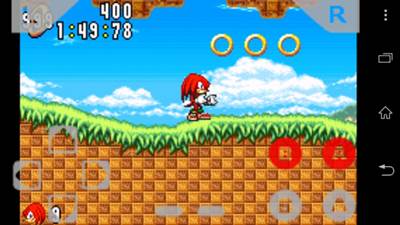
tekken 6 advance gba android


sonic n on android gameboid

Now you are all set to play GBA Game Boy Advance games on android. When you download other Gameboy roms put them in MyGames folder for convenience. Share this wonderful post if you like it. Now check this PlayStation android gaming tutorial.

How To Play Sega Genesis Games On Android

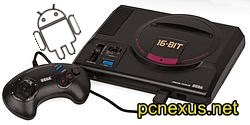
Sega Genesis also known as Mega Drive is a 16-bit video game console launched in 1988 by SEGA. This guide will let you know ‘how to play sega genesis games on android’ phone by using Gensoid android emulator which allows you to play almost any sega genesis game on android phones.

sega genesis android

First of all download the emulator to your android phone from the links below. I am providing gensoid emulator apk and some game roms to play.

SEGA GENESIS emulator for android gensoid apk. To download this just search in Google. You can also search for free roms if downloading them in your country is legal.

Now follow the steps below after downloading all the files from the above links.

  1. Install the gensoid.apk and put the game roms in a directory like “sdcard/Sega”. Make a folder in your sd card and name it "Sega".
  2. Put all the rom files in this folder.
  3. Now open gensoid and click the blue sd card icon on top left. Now move to “Sega” folder. Open any game of your choice.
  4. Now game will run and you will see buttons and a 4 axis controller. Now you have to make appropriate settings for gensoid to play sega genesis games efficiently.
Settings For Gensoid Android Emulator

1.Screen Orientation

  1. Open gensoid a file explorer will open. Now click menu>settings.
  2. A settings page will open click “Other settings” and scroll down to “Orientation” and select “Landscape”. If “Fullscreen mode” is unchecked then check it.

2.Audio And Video Setings


  1. Now go back and click “Audio & Video settings”. Click “Scaling mode” and select “Stretched”. Then select “Aspect ratio” and choose “16:9”.
  2. Now scroll down and select “Max frame skips” and set to “0” and click ok.
3.Input Settings


  1. Now go back and select “Input settings”. Click “Virtual keypad settings”. Uncheck “Vibrate on keypress”.

  2. Now select  “Controls size”. Select controls size according to your phone’s screen. For example if you are using galaxy note 2, galaxy note 3 then choose “Large” then click ok. For android phones having only 3 inch touchscreens choose “Medium”.

  1. Now click “Hide controls” and uncheck “Disable A/B  turbo”. If you uncheck this option then you will see four buttons on screen that is two normal and two turbo buttons.
  2. Now click “D-pad + buttons layout” and choose “Bottom+bottom”.
  3. Now click “Layout margin” and select 1 by sliding to left then click ok.
  4. Now go back until you see the game and start playing sega genesis games on android.
4. Load And Save A Game


At any time while playing the game you can save the game and later load it from where you left it. To save a game in Gensoid tap the menu button and choose 'Save'. Then choose any slot from slot 1-9 and an additional slot 'Quick' save. When you tap any slot the game will be saved.


To load a saved game state tap menu button and choose 'Load' and select the state from the list that you saved earlier. The game will load from where you left it.

5. Enable Cheats 
If you any cheat codes for sega genesis then you can apply them in gensoid. Cheat codes help to gain unlimited money, coins and lives in any game. To apply a cheat code in gensoid. Follow the steps below.

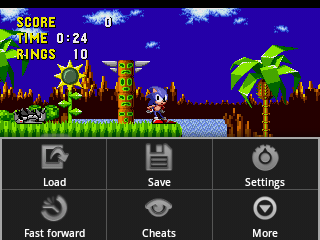
  • Tap menu button and choose 'Cheats'.
  • Then again tap menu button and choose 'New cheat'.
  • Now enter name and the code and tap 'OK'.
Screenshots


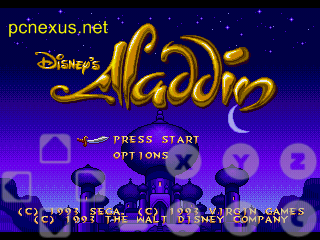
sega genesis aladdin on android

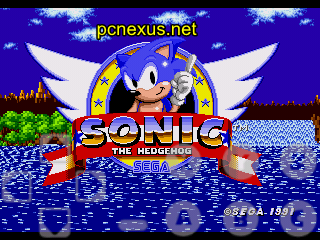
sonic the hedgehog sega genesis android

Now you are all set to play sega genesis games on android. When you download other sega genesis games roms put them in Sega folder for convenience. Share this wonderful post if you like it. Now check this gaming tutorial.

How To Play SNES Games On Android

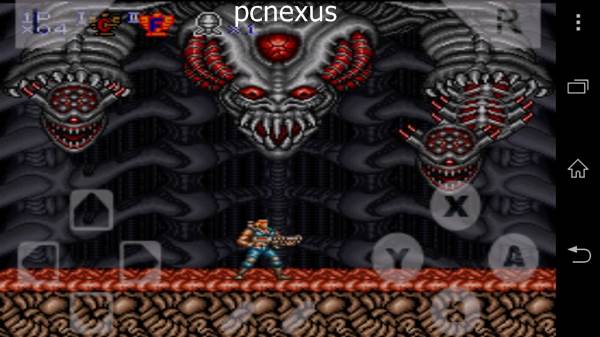
How To Play Nes Games On AndroidSNES stands for Super Nintendo Entertainment System. It appeared in the 90’s. It is a 16 bit video game console developed by Nintendo and almost everyone has played at least one game of it. It is a very old Famicom system and at its time of release we were either too little or might have not been born. We played most nes games in our childhood days. Some famous snes game are super mario world, wwf wrestlemania arcade game, street fighter the new challengers, contra 3 : the alien wars, aladdin, mega man x, bomber man 5 and TMNT: turtles in time. This guide will let you know ‘how to play snes games on android’ phone by using snes android emulator snesoid which allows you to play almost any snes game on android phones.


First of all download the emulator to your android phone from the links below.I am providing nesoid emulator apk and some game roms to play.

SNES emulator for android snesoid apk download

Game Roms
  • Downloading ROMs isn't legal in various countries. So before downloading just check the local law in your country for downloading any kind of software from the internet.

How To Play SNES Games On Android

Now follow the steps below after downloading all the files from the above links.

  1. Install the snesoid.apk and put the game roms in a directory like “sdcard/snes”. Make a folder in your sd card and name it snes.
  2. Put all the rom files in this folder.
  3. Now open snesoid and click the blue sd card icon on top left. Now move to “snes” folder. Open any game of your choice.
  4. Now game will run and you will see buttons and a 4 axis controller. Now you have to make appropriate settings for snesoid to play snes games efficiently.

Settings For Snesoid Android Emulator


1.Screen Orientation

  1. Open snesoid a file explorer will open. Now click 'Menu>Settings'.
  2. A settings page will open click “Other settings” and scroll down to “Orientation” and select “Landscape”. If “Fullscreen mode” is unchecked then check it.

2.Audio And Video Setings

  1. Now go back and click “Audio & Video settings”. Click “Scaling mode” and select “Stretched”. Then select “Aspect ratio” and choose “16:9”.
  2. Now scroll down and select “Max frame skips” and set to “0” and click ok.

3.Input Settings

  1. Now go back and select “Input settings”. Click “Virtual keypad settings”. Uncheck “Vibrate on keypress”.

  2. Now select  “Controls size”. Select controls size according to your phone’s screen. For example if you are using galaxy note 2 then choose “Large” then click ok. For android phones having only 3 inch touchscreens choose “Medium”.

  3. Now click “Hide controls” and uncheck “Disable A/B  turbo”. If you uncheck this option then you will see four buttons on screen that is two normal and two turbo buttons.
  4. Now click “D-pad + buttons layout” and choose “Bottom+bottom”.
  5. Now click “Layout margin” and select 1 by sliding to left then click ok.
  6. Now go back until you see the game and start playing snes games on android.
Connect A Gamepad/Keyboard In Snesoid
You can use a USB gamepad or keyboard if you are playing games on android tablet with OTG support. But you have make settings for controls on keyboard or gamepad. To make the settings, follow the steps below.

  • Go to 'Settings>Input settings>Key mappings'.
  • Now you will see all the list of the buttons.
  • Scroll down a little bit and tap on any button to assign the keyboard button.
  • For example tap 'Button B' a popup will open 'Press a hardware key'. Press your desired key on the keyboard or gamepad.
  • Make the settings for rest of the buttons.


Screenshots


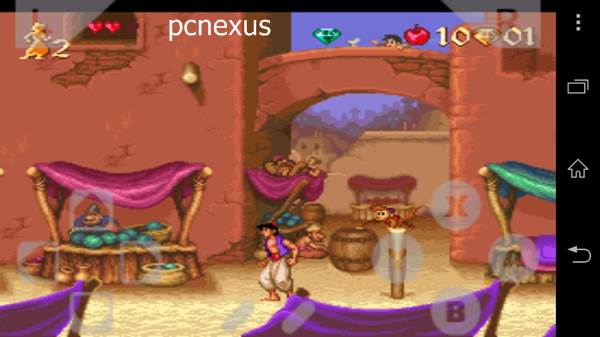
snes android games


Watch The Video


Now you are all set to play snes games on android. When you download other snes games roms put them in snes folder for convenience. Share this wonderful post if you like it. Now check these tutorial about PLAYSTATION, MAME and NEOGEO.