Microsoft just retired their Windows Live Movie Maker on January 17, 2017, and it is not available to download by any means. If somehow you get the executable file of Windows Movie Maker then it will not install on Windows 10. However, it may still work on Windows 7 but will not get any Microsoft support. If you were previously using Windows Movie Maker then you might be wanting it to work on Windows 10. And for this, you may download the Windows Movie Maker setup file from third-party sites. But I suggest not to do this because that file may contain malicious code which can harm your computer and files.
There are many free video editing software available on the internet. And some of them resembles the Windows Movie Maker. An example of this is a VideoPad video editor. Some other free alternatives to Windows Live Movie Maker are Shotcut, VSDC free video editor, and Avidemux. But a free video editor does come with some limitations.
Some of them will put their watermark in your videos. Some of them will not let you convert videos to Full HD or 4K. And mostly free video editors don't provide the essential video editing tools which are required to produce a meaningful video. If somehow free video editors provide you full features then they will be limited in some way and you will be asked to upgrade the software by paying money.
So why wasting your precious time behind free video editors when you can get the full-featured video editor at a dirt cheap price with a lifetime license. If you are affected by the Microsoft's decision of retiring the Windows Movie Maker then this article will benefit you. In this article, we are providing you the cheapest paid alternative to Windows Movie Maker 2018.
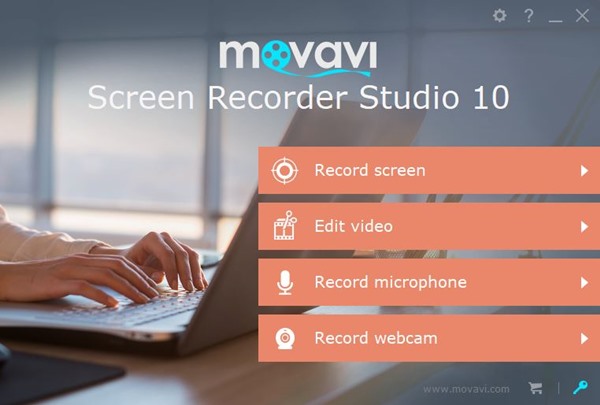
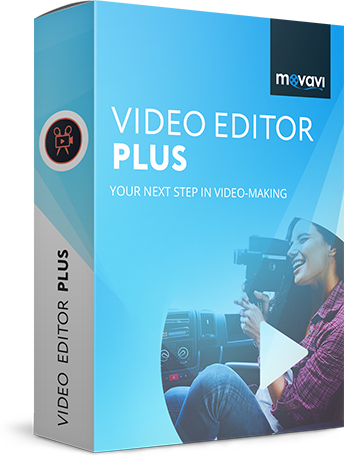
This cheapest paid Windows Movie Maker alternative is Movavi Video Editor 14 Plus. Besides knowing the useful features of a particular software most users will always quote the price as a 'cons'. But after reading this article your views will be in the favor of this paid software as you can have it at a dirt cheap price with a lifetime license.
2. Green Screen Video: You may have seen many videos on YouTube or TV where the actors are shot against the green screen that later is replaced by burning cars, collapsing skyscrapers, or landscapes of astonishing beauty. This is also known as chroma key effect. Just shoot your video against a solid green background and use Movavi Video Editor to replace the background with the movie or video of your choice.
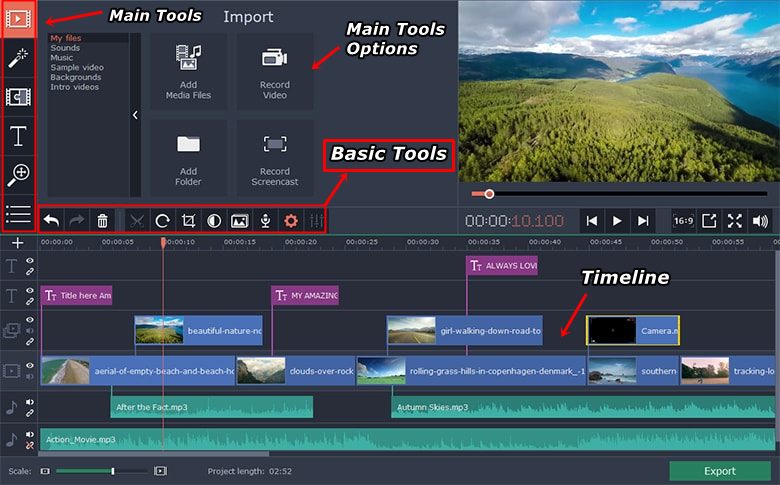
3. Picture in Picture (Split screen video): Showing multiple videos (side-by-side) on the same screen is an essential feature that wasn't supported by the Windows Movie Maker. With Movavi you can split the screen between two videos and also choose or delete the audio from the videos. You can place many videos on the same screen.
4. Built-in Media: Movavi Video Editor Plus has built-in media. It has 16 new video clips, 86 themed stickers and 22 new music tracks. So it is easy to put the background music in your videos without taking care of the copyrights if you are sharing them on YouTube.
5. Cut, Trim, Rotate, Join Videos: You can cut, trim, rotate, and join multiple videos together.
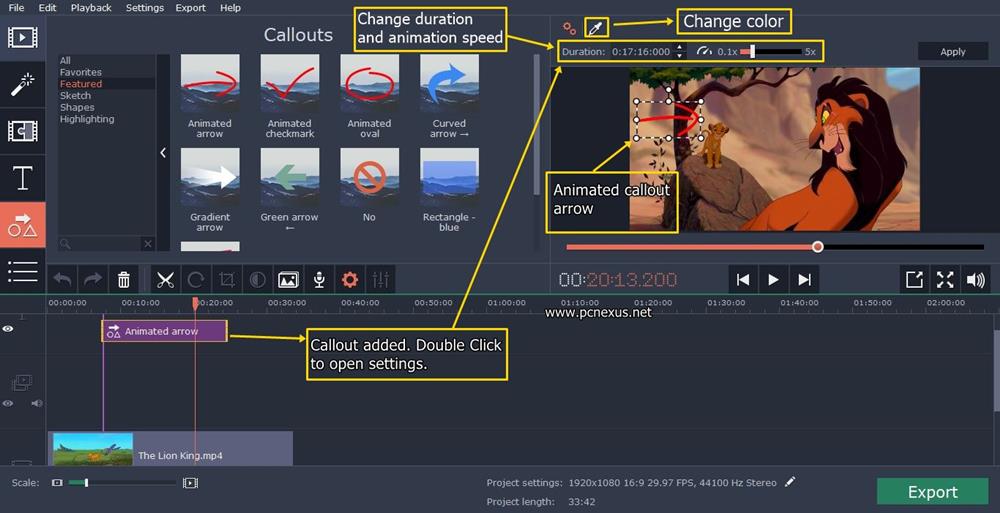
6. Callouts: During a video, you may need to highlight something on the screen with an arrow or an animated circle. For this purpose, callouts can be used to highlight or point towards important information in the video.
7. Highlight and Conceal: If you want to blur out faces or hide parts of a video and then use the conceal feature. But the only cons of this feature is that the hiding is not object tracking based. It only hides a fixed part on the screen. But it is still useful if the object is not moving.
8. Text Titles: Movavi Video Editor 14 Plus has lots of title texts. You can use them stylize texts in your video with animation. The texts can also be used to create intros for your brand. There are many text templates available and you can edit and design the text to fit your editing needs.
9. Countdown/Stopwatch Video Timer: Ever wondered how YouTube videos show stopwatch or countdown timers along with the playing videos? The timers feature wasn't available in the Windows Movie Maker and it is useful if you are making a video which requires an on-screen timer to record the time. The timer can be applied to any time-related video like counting the minutes of a booting computer on SSD. Counting the time of your gameplay videos.
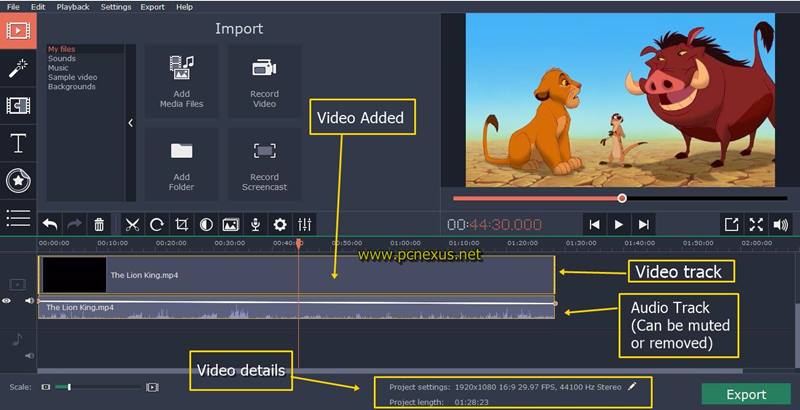
10. Video Formats: You don't need to worry about video formats as Movavi supports almost every important video format that is mostly used by us like MP4, AVI, MPEG, MKV, DVD etc. You can export your video in 4K format also for UHD TVs and screens. All resolutions are supported and custom resolutions are also supported.
➜ If you want to know more about this software then please read a detailed review of Movavi Video Editor 14 Plus.
If you are convinced with the features and performance of this paid easy video editing software then you can order this software from the link below. It will only cost you as low as $24 dollars for a lifetime license for one PC. The software comes with 30-day money back guarantee. So, at any time within 30 days of purchase, you can get your money back if you don't like it. Buy this cheap windows 10 video editor from the link below.
The activation process is quick and simple. After making the payment you will receive an email on the email address that you used to make the purchase. That email will have the download link and your lifetime license for the Movavi video editor 14 plus. To activate the software just enter your email address and license key in the software.
There are some limitations with future upgrades and activation. You can use the license key 5 times to activate the software after that you have to request a new one via the Movavi support. This process is free and you won't be charged for new keys as far as your contact with the support with your registered email address and order details. You can use the software for a lifetime and will receive minor upgrades. But whenever a new version launches then you may be asked to upgrade by paying some amount. It's not mandatory to upgrade and you can continue to use your software.
There are many free video editing software available on the internet. And some of them resembles the Windows Movie Maker. An example of this is a VideoPad video editor. Some other free alternatives to Windows Live Movie Maker are Shotcut, VSDC free video editor, and Avidemux. But a free video editor does come with some limitations.
Some of them will put their watermark in your videos. Some of them will not let you convert videos to Full HD or 4K. And mostly free video editors don't provide the essential video editing tools which are required to produce a meaningful video. If somehow free video editors provide you full features then they will be limited in some way and you will be asked to upgrade the software by paying money.
So why wasting your precious time behind free video editors when you can get the full-featured video editor at a dirt cheap price with a lifetime license. If you are affected by the Microsoft's decision of retiring the Windows Movie Maker then this article will benefit you. In this article, we are providing you the cheapest paid alternative to Windows Movie Maker 2018.
This cheapest paid Windows Movie Maker alternative is Movavi Video Editor 14 Plus. Besides knowing the useful features of a particular software most users will always quote the price as a 'cons'. But after reading this article your views will be in the favor of this paid software as you can have it at a dirt cheap price with a lifetime license.
Features Of Movavi Video Editor 14 Plus
1. Object Animation: With this feature, you can animate objects and turn them into a moving animation by using keyframes. Object animation is a useful feature that is needed to animate clipart themed videos. Windows Movie Maker didn't have this feature.2. Green Screen Video: You may have seen many videos on YouTube or TV where the actors are shot against the green screen that later is replaced by burning cars, collapsing skyscrapers, or landscapes of astonishing beauty. This is also known as chroma key effect. Just shoot your video against a solid green background and use Movavi Video Editor to replace the background with the movie or video of your choice.
3. Picture in Picture (Split screen video): Showing multiple videos (side-by-side) on the same screen is an essential feature that wasn't supported by the Windows Movie Maker. With Movavi you can split the screen between two videos and also choose or delete the audio from the videos. You can place many videos on the same screen.
4. Built-in Media: Movavi Video Editor Plus has built-in media. It has 16 new video clips, 86 themed stickers and 22 new music tracks. So it is easy to put the background music in your videos without taking care of the copyrights if you are sharing them on YouTube.
5. Cut, Trim, Rotate, Join Videos: You can cut, trim, rotate, and join multiple videos together.
6. Callouts: During a video, you may need to highlight something on the screen with an arrow or an animated circle. For this purpose, callouts can be used to highlight or point towards important information in the video.
7. Highlight and Conceal: If you want to blur out faces or hide parts of a video and then use the conceal feature. But the only cons of this feature is that the hiding is not object tracking based. It only hides a fixed part on the screen. But it is still useful if the object is not moving.
8. Text Titles: Movavi Video Editor 14 Plus has lots of title texts. You can use them stylize texts in your video with animation. The texts can also be used to create intros for your brand. There are many text templates available and you can edit and design the text to fit your editing needs.
9. Countdown/Stopwatch Video Timer: Ever wondered how YouTube videos show stopwatch or countdown timers along with the playing videos? The timers feature wasn't available in the Windows Movie Maker and it is useful if you are making a video which requires an on-screen timer to record the time. The timer can be applied to any time-related video like counting the minutes of a booting computer on SSD. Counting the time of your gameplay videos.
10. Video Formats: You don't need to worry about video formats as Movavi supports almost every important video format that is mostly used by us like MP4, AVI, MPEG, MKV, DVD etc. You can export your video in 4K format also for UHD TVs and screens. All resolutions are supported and custom resolutions are also supported.
➜ If you want to know more about this software then please read a detailed review of Movavi Video Editor 14 Plus.
Buy Movavi Video Editor 14 Plus
If you are convinced with the features and performance of this paid easy video editing software then you can order this software from the link below. It will only cost you as low as $24 dollars for a lifetime license for one PC. The software comes with 30-day money back guarantee. So, at any time within 30 days of purchase, you can get your money back if you don't like it. Buy this cheap windows 10 video editor from the link below.There are some limitations with future upgrades and activation. You can use the license key 5 times to activate the software after that you have to request a new one via the Movavi support. This process is free and you won't be charged for new keys as far as your contact with the support with your registered email address and order details. You can use the software for a lifetime and will receive minor upgrades. But whenever a new version launches then you may be asked to upgrade by paying some amount. It's not mandatory to upgrade and you can continue to use your software.